


Yes, you can build a pergola on a deck, provided the deck's structure can carry the extra load and the posts are fixed through the decking into the framing or footings below. A pergola on a deck needs to be planned as a structural addition, because wind uplift, weight and water ingress are what can cause damage, not the timber or aluminium itself.
This guide sets out how to assess your deck, choose a suitable pergola, fix it securely and protect the surface beneath. It is written for UK homeowners planning a premium covered outdoor space, whether that means a dining terrace, a barbecue area or a full outdoor kitchen.
Gather the right information and equipment first, because most deck damage comes from decisions made before a single hole is drilled.
Information to collect:
Tools and materials:
If the pergola is a premium aluminium system, the manufacturer's installation manual takes precedence over generic guidance. Professional installation is worth considering for larger structures, and Cotswold Cooking Company offers installation of pergolas, verandas and canopies.
Whether you can put a pergola on a deck depends on three things: the deck's load rating, the condition of its joists and the way it is supported at ground level.
Residential decks are generally designed to carry people and furniture, not the concentrated point loads that pergola posts create. A post can transfer both the structure's weight and wind forces into a very small area of decking. Inspect the following:
If you are unsure, ask a structural engineer or experienced carpenter to assess it. An older deck, particularly one made from softwood, may need reinforcement or replacement before it takes a pergola.
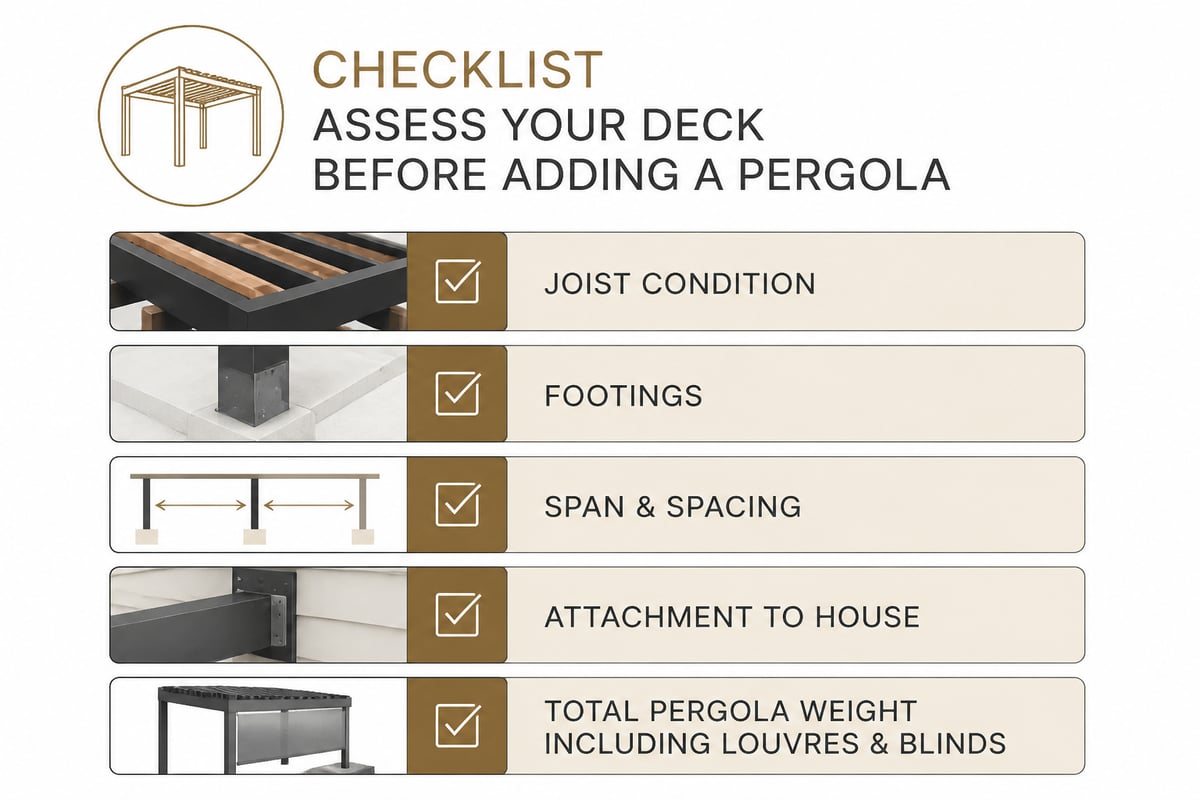
Most garden pergolas in England can be built without planning permission under permitted development, but decks and raised structures have limits that are easy to exceed.
Raised platforms, structures close to boundaries and any pergola attached to a listed building or within a conservation area can all trigger approval requirements. The Cotswolds includes areas of protected landscape and many conservation areas, so check with your local planning authority before ordering. The government's Planning Portal is the standard starting point for householder guidance.
On the question of neighbours, a neighbour can complain about a pergola, but a complaint only succeeds if the structure breaches planning rules, building regulations or a covenant on your property. Height, proximity to a boundary and overlooking are the usual grounds. Speaking to neighbours early, and positioning the structure sensibly, avoids most disputes.
The best pergola for a deck is one whose weight, footprint and fixing method match what the deck can support.
| Pergola type | Typical weight | Deck suitability | Key consideration |
|---|---|---|---|
| Light timber open-rafter | Low to moderate | Good on sound decks | Needs sealing against moisture |
| Aluminium fixed roof | Moderate | Good with post blocking | Powder-coated finish resists weathering |
| Aluminium louvred or bioclimatic | Moderate to high | Needs verified support | Motors, drainage and wind rating matter |
| Glazed or integrated-blind systems | Higher | Often needs reinforcement | Point loads at each post are larger |
Aluminium suits most British decks because it is lighter than solid hardwood, does not rot and holds its finish through wet winters. Our guide to how to choose the perfect pergola or veranda covers the design decisions in more detail, and our article on the louvre roof pergola explains how adjustable roofs perform across the seasons.
For a design-conscious deck, the Tarasola Technic bioclimatic pergola is a European-made, architectural option with a motorised louvred roof that controls sun, shade and rain. Confirm the weight and fixing requirements with the supplier against your deck's capacity before specifying it.
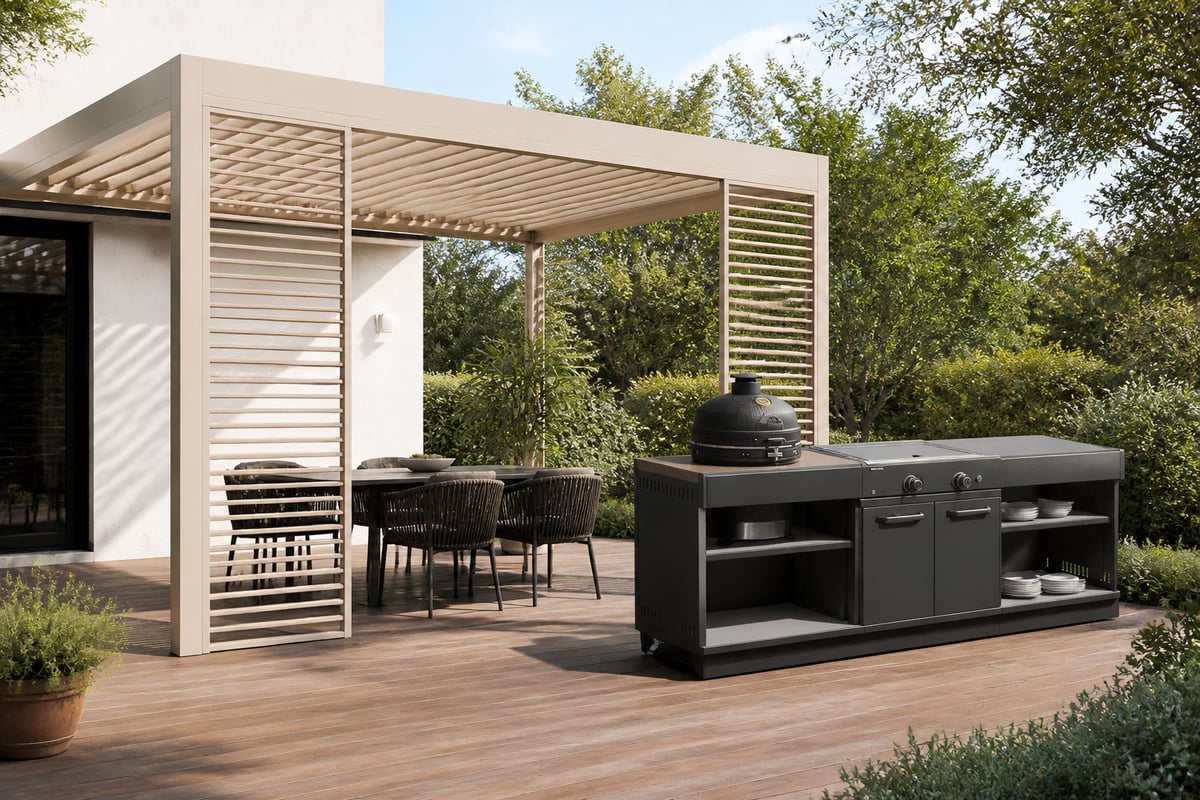
A freestanding pergola isolates the structure from your house and gives you more flexibility, while a wall-attached design saves two posts but demands careful flashing and fixing.
Freestanding designs sit on four or more posts and can be placed anywhere the deck is strong enough. They are generally the simpler choice where the deck is attached to the house, since you avoid adding loads to a ledger connection.
Wall-attached designs are anchored to the house on one side. They create a seamless link between indoors and out, but the fixings must penetrate the wall without letting water in. Flashing, sealant and correct fixing into masonry or structural timber are essential. Our guide to a pergola attached to a house sets out the considerations in full.
If your deck is raised or sits against the house wall, a freestanding structure is usually the lower-risk option.
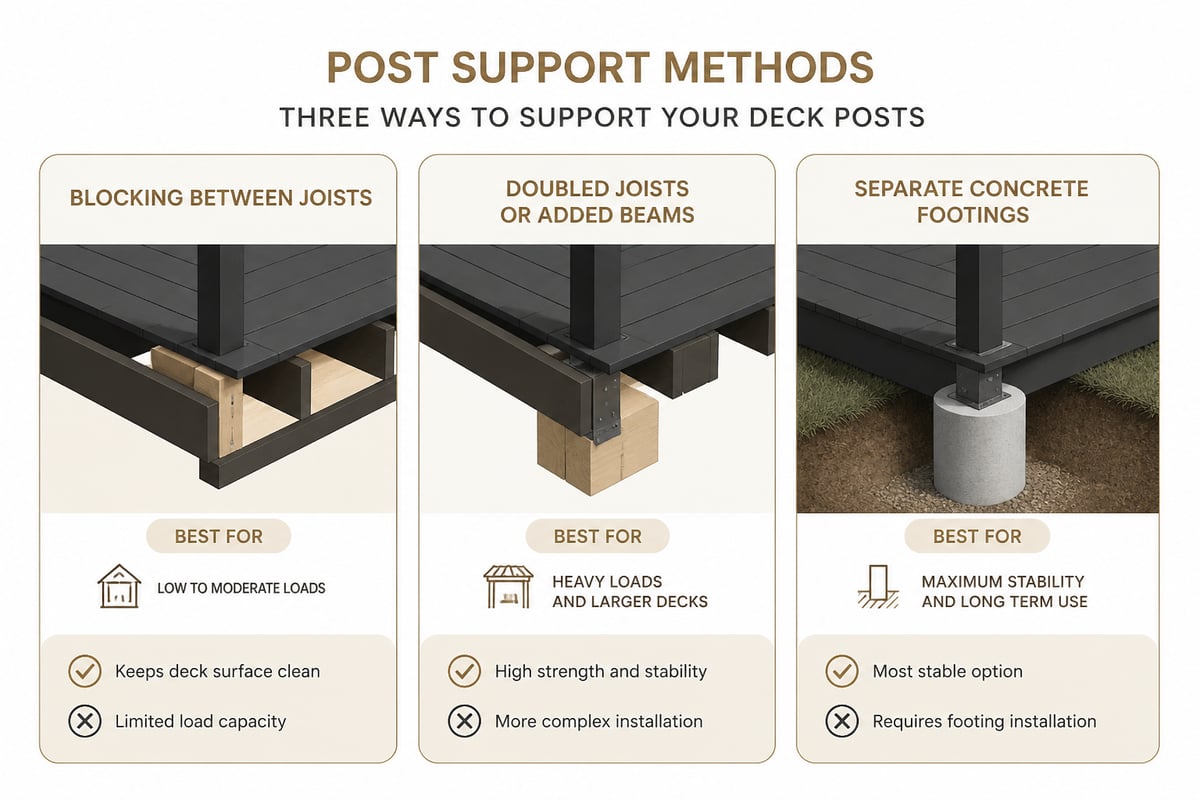
Posts should transfer their load into reinforced framing or directly to the ground, never rely on the surface boards alone.
Choose one of three approaches, depending on your deck:
The third method is often the best for large aluminium pergolas, since it keeps the weight off the deck entirely. Mark post positions with a chalk line, check that they are square by measuring the diagonals, and confirm the final layout before cutting anything.
Posts must be anchored to resist upward and sideways forces, because wind acting on a roof surface can lift a pergola as readily as it pushes it.
According to Decks.com, wind can create strong uplift on a pergola, and diagonal 45-degree bracing between posts and headers can improve stability. Use this alongside proper post fixings:
Louvred roofs that close in strong wind reduce exposure, which is one reason they perform well in exposed gardens.
Build the frame in a logical sequence so each stage is level, square and braced before the next load is added.
Electrical work for motorised roofs, heaters or lighting should be carried out by a qualified electrician and comply with Part P of the Building Regulations. If you plan a barbecue, pizza oven or cooking zone beneath the roof, plan clearances to the roof material at this stage. Our article on a pergola with a grill discusses ventilation and layout.
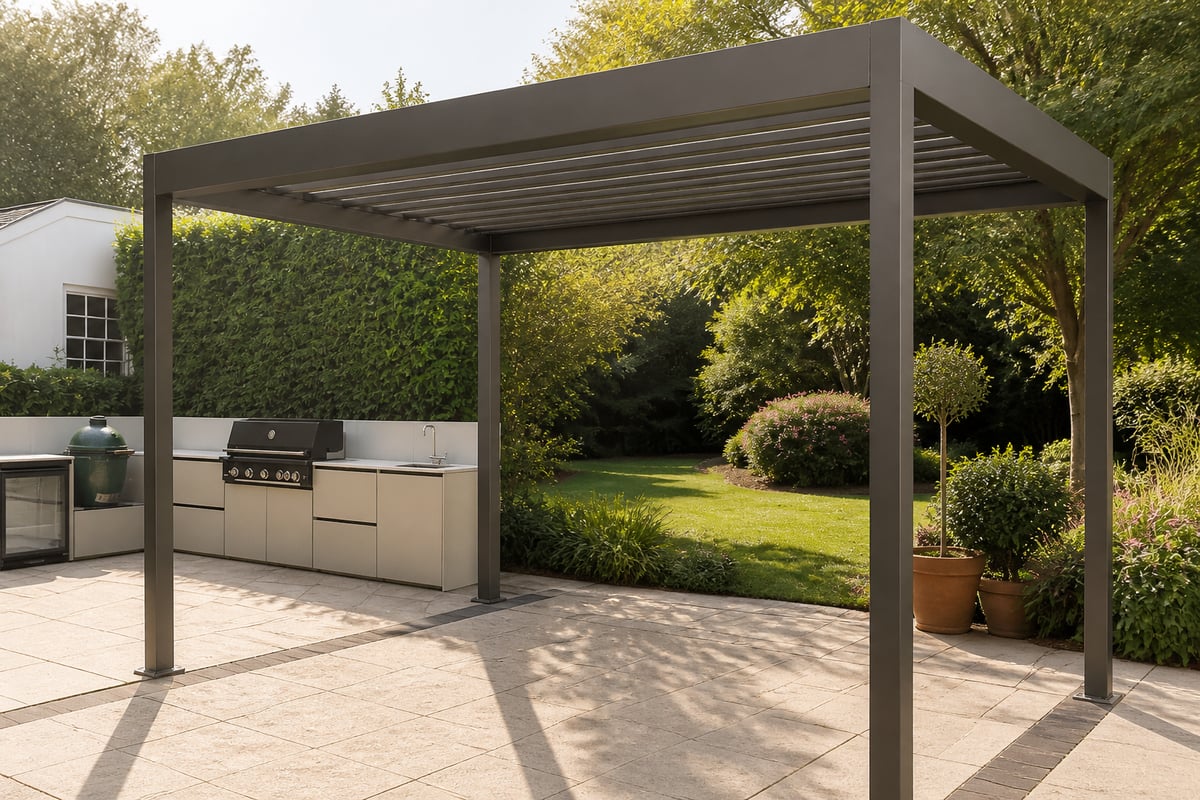
Water pooling around post bases and under furniture is the most common cause of deck damage after installation, so protection should be built in from day one.
If you are weighing up shading and weather protection more widely, Woodstock Shutters offers bespoke shutters that suit sheltered, light-controlled spaces closer to the house.
A pergola gives a deck defined structure, shade and shelter, turning an exposed platform into a usable outdoor room.
The benefits are practical as well as aesthetic:
For a luxury outdoor kitchen, a pergola over the deck extends the season well into autumn and spring. Our notes on a pergola with a barbecue and on patios and pergolas show how to plan cooking, seating and circulation together. For wider garden design inspiration, LuxuryTrees offers high-end garden architecture and landscape design.
Most problems trace back to a handful of avoidable errors.
If a post feels loose after installation, check the base fixings, tighten the bolts and confirm the blocking has not shifted. If the deck sags beneath a post, add a support or move the post to a footing that reaches the ground.
Yes, but a complaint only has force where the pergola breaches planning rules, building regulations or a covenant. Height, closeness to a boundary and overlooking are the usual issues. Check your permitted development rights and speak to neighbours before building.
Check the deck's structure, confirm planning requirements, choose a suitable design and reinforce the framing beneath each post. Then anchor the posts with stainless or galvanised fixings, add diagonal bracing, assemble the frame and roof, and protect the deck from moisture. For premium aluminium systems, professional installation is recommended.
Not if it is planned correctly. Damage comes from overloading the deck, fixing to the surface boards only, or letting water collect around the post bases. Reinforcement, standoffs and good drainage prevent most problems.
Aluminium is generally the most practical choice, as it is lighter than hardwood, resists rot and keeps its finish in wet weather. Timber can work on a well-maintained, reinforced deck with regular sealing.
A freestanding pergola is usually the lower-risk option for a deck, especially one attached to the house. A wall-attached design suits those who want a seamless link to the home and are happy to manage the flashing and fixings carefully.
Before you order anything, measure your deck, photograph the joists underneath and confirm what loads it can safely take. Cotswold Cooking Company can then help you specify a structure to suit, from the Tarasola Technic bioclimatic pergola to a complete outdoor kitchen layout, with installation, free UK mainland delivery and a showroom in Oxfordshire where you can see the range in person. To spread the cost of a premium covered space, explore the Buy Now Pay Later options available through Cotswold Cooking Company.

Leave a comment